Past Blog Posts:
Jeweled Trees Tutorial by Laura Carson
Filed under Art Projects, Bella's Corner, Design Team, Newsletters, Sale, Tutorials
 Here I sit, dumbfounded, trying to think up something oh-so-clever to say about Laura Carson’s latest, stunning creations. The latest that is, since this past Thursday.
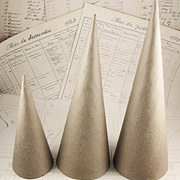 So instead I’ll just dive right in and ask you to take a look at these gorgeous, bejeweled, sparking, shining trees that are started from a Paper Mache Cone! (Hey, and see below about ALL the Paper Mache items being On Sale! That includes these cones, too!) You all know that I am like a crazed Magpie that loves things that sparkle and shine so I have a very hard time resisting this sort of thing. Perhaps I should trade my mother for the Silver and the Gold & Black Trees, as they have the most bling. Yessss, perhaps I should. Laura, just email me if you’d like to trade.
 Oh my how I digress. While I am crazy over the bling-filled trees, I also love how Laura created “ornaments” from Polymer Clay Molds using Paper Clay for the Copper & Patina Tree. Paint your clay pieces with Alcohol Inks, Gilders Paste or Metallic Paint and you have beautiful ornaments! There’s a secret though to how you get your ornaments to fit flush against the tree and of course you know I am not going to tell you what it is. You’ll have to read the tutorial to find out what it is!
I also love how Laura colors the adhesive-backed pearls and acrylic “jewels” with Alcohol Inks (see the photo at right showing Copper Ornate Filigree with pearls and teardrop jewels tinted green with Clover Alcohol Ink). It’s such a great idea! Just buy clear jewels or cream pearls and then tint them to match any project! And the Alcohol Ink is clear so you don’t lose the luster of the pearl finish or the shininess of the jewels.
 There are so many beautiful embellishments on each tree that I’ve broken up the links (to see all the components) per tree:
– Copper and Patina Tree
– Silver and Pearl Tree (and jewelry! as Laura has turned this tree into an earring tree)
– Gold and Black Tree (and jewelry!)
 Also worth noting is that these trees don’t just have to be for the traditional winter holidays — oh no they don’t! The trees would look stunning at any time of the year and could be decorated either by season or for a particular room theme.
So here’s the link again to Laura’s Jeweled Trees Tutorial. And remember: the items below are just a preview of the (New!) items used in the tutorial (you can see all the New Items here).


