Past Blog Posts:
Retro Christmas Advent Calendar Tutorial
Filed under Art Projects, Christmas, Tutorials

Aren’t you glad that the Design Team is already so into the holiday spirit?! Last week Laura Carson showed you how to make an Christmas Tree Advent Calendar and this week Teri Calia is showing you how to make a Retro Christmas Advent Calendar!
Depending on your style, one or the other should work well either for yourself, to give out as gifts or hey, why not do both? My favorite part of Teri’s calendar is the incorporation of black with the classic Christmas colors. It works really well together, don’t you think?
Teri said,
I’ve been feeling full of the Christmas spirit this year so I decided I really needed to try my hand at making an Advent Calendar. I love mid-century/retro style so the New! Believe Retro 6×6 Paper Pad and the coordinating Believe Glittered Banners were the perfect choice for my project.
Let’s make it a hand-made holiday season this year!
Supplies
– Sticky Thumb Dimensional Foam (for gluing on the numbers)
– Believe 6″ x 6″ Paper Pad
– Believe Santa Baby 12″ x 12″ Paper
– Believe Glittered Banners
– Diamond Stickles
– Bakers Twine – Red
– Bakers Twine – Lime
– Tiny Paper Mache Star Box
– Tiny Paper Mache Square Boxes
– 12×12 Chipboard
|
Psst! See the related Newsletter with more new items |
– Red Acrylic Paint
– Black India Ink Stamp Pad
– Ranger Ink Blending Tool
– White Glue
– Hot Glue and Hot Glue Gun
– Masking Tape
Directions
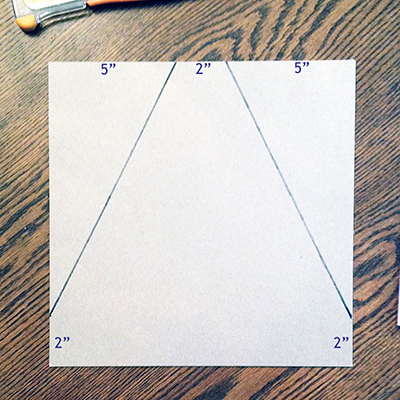
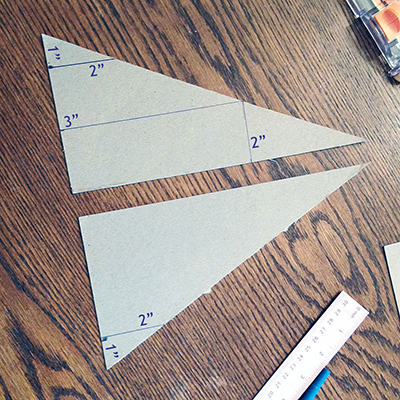
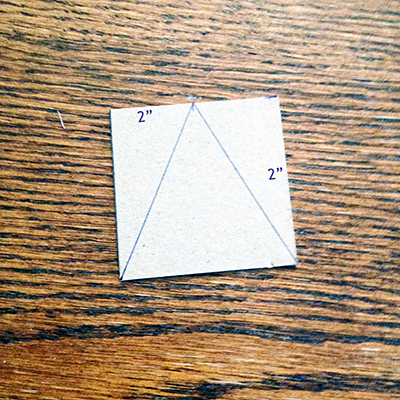
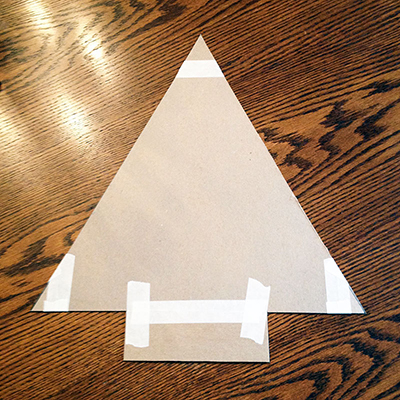
Start by cutting up your 12×12 Chipboard in the following manner:
When you have finished cutting out your 5 pieces of chipboard lay them out in this manner:
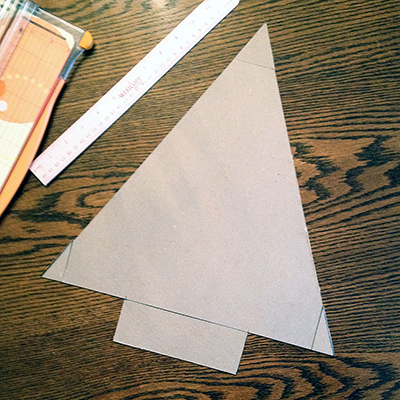
and tape them together with masking tape like this:
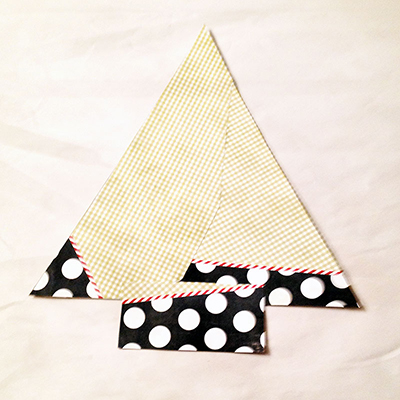
Cover your chipboard tree shape with paper. Most of this will not be visible so just make sure the edges of the tree look their best:
Ink the edges of your tree shape with the Black India Ink Stamp Pad and Ranger Ink Blending Too, if desired, and put your tree aside for now.
Next you should apply Gesso to all of surfaces on your Tiny Paper Mache Square Boxes and Tiny Paper Mache Star Box that will be painted. I chose to paint all of the sides of my boxes both inside and out so my boxes looked like this:

After the Gesso has dried, paint over it with two coats of Red Acrylic Paint. While the paint is drying you can pick out the paper you want to cover the tops and bottoms of your boxes with and cut them to size. You can also ink the edges of the paper before you glue it to the boxes with your white glue:

While your playing with the Believe Retro Christmas 6 x 6 Paper Pad you should cut out numbers 1 through 25 (these will be used to number each one of your boxes when you decorate your calendar):

Next, using your hot glue gun, glue the tops of all of the boxes upside down onto your chipboard tree shape like this:

Here’s what your advent tree should look like when it is all together:

Now you can have fun with the decorating and adding the goodies to the inside of each box!


Here’s what my finished tree looks like:
