Past Blog Posts:
Gold Leaf and Alcohol Ink Acrylic Tags Tutorial
Filed under Art Projects, Christmas, Design Team, Tutorials
Note: most of the links on this post no longer work, as we moved to a new Web site in 2018. But you can try searching on the same names (as links below) on the new site.
 by Design Team Member
Barbe Saint John
Materials:
- Acrylic Tags
- Acrylic Shrine Tags
- Alcohol Inks
- Gold Leaf
- Gold Leaf Adhesive Pen
- Ultra Seal, Diamond Glaze or Weldbond
- Alcohol Ink Fillable Pen
- Scroll Filigree Connector
- Ornate Filigree
- Cloisonne Red Rose Bead
- Cloisonne Green Drum Flower Bead
- 2 Inch Borders Collage Sheet
- Winter Holidays Pendant Collage Sheet
- Retro Santas Stamp Set
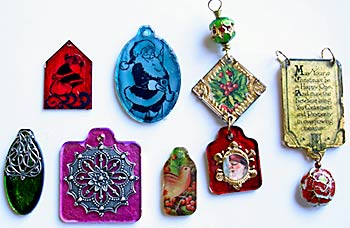
While working on Acrylic Tag Ornaments, I pulled out my alcohol inks to add a bit of color and then added some faux gold leaf to see how it would look. It turned the acrylic tags into small jewel-like baubles that look amazing! It’s really easy to do and looks super lush. You can use any color leaf you may have. Gold is a good neutral color as a background to the alcohol inks; Copper adds more warmth to the ink color while Silver makes it cooler.
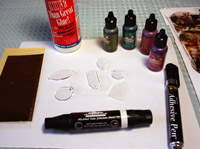 Step 1: Gather your supplies together and lay down paper or a Non-Stick Craft Sheet to protect your work surface. The inks quickly absorb into fabric, tablecloths and wood and are hard to get out (personal experience speaking!)
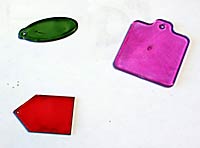 Step 2: Using a back and forth motion, ‘paint’ a layer of Alcohol Ink on your tag with a brush, Alcohol Ink Applicator or even your (gloved) finger. (I used Meadow, Cranberry, Wild Plum and Stream colors.) Be sure to go to all the way to the edges and get a good coating on the tag. You can paint a pale coat or a deep coat of color. I like the Alcohol Ink Fillable Pen. If you put down a lot of ink, it will pool but as long as you spread it evenly it will look great. Set tag down and allow to it dry completely. If you don’t like it, you can use rubbing alcohol to remove the ink and try again.
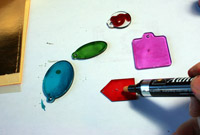 Step 3: When the tags are completely dry, apply the gold leaf adhesive on top of the painted surface. I LOVE the Gold Leaf Adhesive Pen because it’s less messy than a brush and bottle. It is white while wet and dries clear. Make sure you get a good coating on the tag especially around the edges. Allow the gold leaf adhesive to try thoroughly; this usually takes 15 or so minutes.
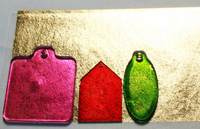 Step 4: Pull one sheet of Gold Leaf out of the booklet. When the adhesive is dry, set the tags on the gold leaf and press down, carefully flip over the sheet and lightly burnish the back of the tags. Turn sheet over and carefully pull off the tags. Using a soft brush or rag, lightly burnish gold leaf on the backs of the tags. Apply a thin coat of sealer to prevent the gold leaf from tarnishing.
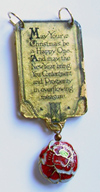 Step 5: Now comes the fun part, embellishing the fronts! Use glue that dries clear like Weldbond, Ultra Seal, or Diamond Glaze. Transparency images look wonderful on top of the tags but be sure to use a thin coat of glue or it will take a couple of days for it to dry completely. The aqua tag with Santa shows what that looks like. I like to add filigree elements on them and they look like jewelry pieces. Adding charms, collage sheet images or rubber stamps and embossing will give you all kinds of creative options with these tags. If you stamp and emboss be VERY careful when using the heat gun. The tags are plastic and can melt if they get too hot.
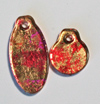 Another creative option: Here’s another fun option that’s reverse of the above directions. First I applied gold leaf to clear/unpainted tags. I then I painted the alcohol ink on TOP of the gold leaf than applied a sealer to it. The colorful ink sunk into all the tiny cracks in the gold leaf and created a really pretty batik-like look!
More photos of acrylic tag/alcohol ink ornaments by Barbe are in the gallery.
